PVC pipes are a staple in plumbing systems due to their durability and affordability. However, even the sturdiest pipes can succumb to wear and tear, resulting in leaks or cracks. Fortunately, repairing a broken PVC pipe is a manageable task with the right tools and techniques. Let’s explore the steps to effectively repair a damaged PVC pipe.
Mastering the Art of PVC Pipe Repair: A Comprehensive Guide
Assess the Damage
Begin by identifying the location and extent of the damage. Inspect the pipe for cracks, holes, or leaks. If the damage is minor, you may be able to repair it without replacing the entire section of pipe.
Gather the Necessary Tools and Materials
Before starting the repair process, gather the following tools and materials:
PVC pipe cutter or hacksaw
Emery cloth or sandpaper
PVC primer and cement
PVC repair fittings (such as couplings or compression fittings)
Clean rag or cloth
Safety gloves and goggles
Cut Out the Damaged Section:
Using a PVC pipe cutter or hacksaw, carefully cut out the damaged section of the pipe. Make straight cuts perpendicular to the pipe to ensure a proper fit for the repair fittings.
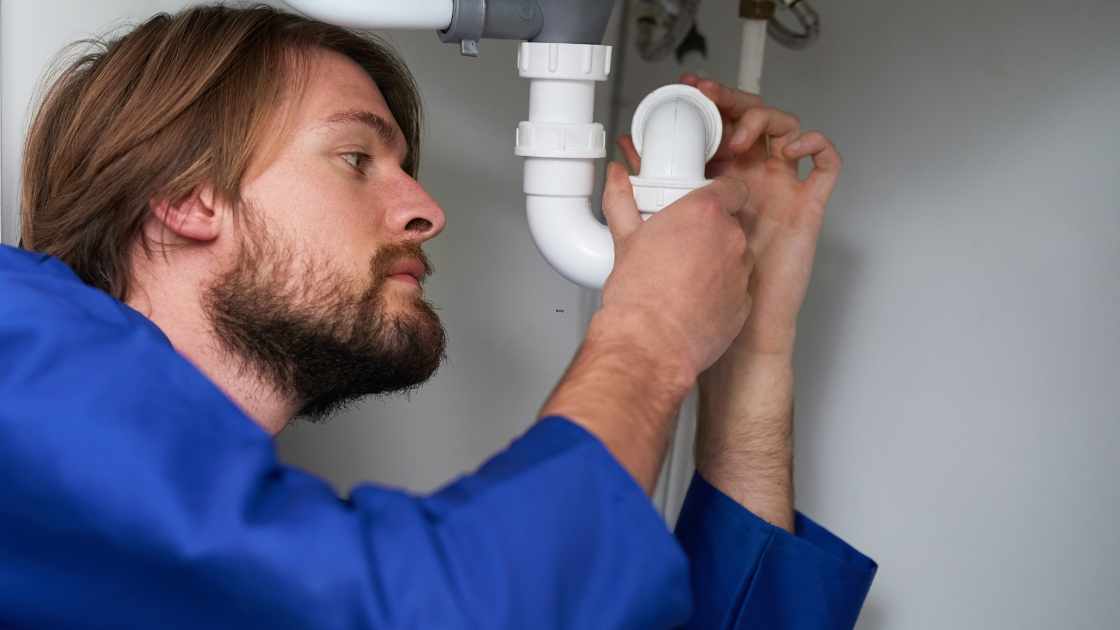
Prepare the Pipe and Fittings:
Once the damaged section is removed, use emery cloth or sandpaper to clean and roughen the ends of the remaining pipe and the inside of the repair fittings. This rough surface will promote better adhesion when applying the primer and cement.
Apply Primer and Cement:
Apply a layer of PVC primer to the outside of the pipe and the inside of the repair fittings. Allow the primer to dry for a few seconds, then apply a generous layer of PVC cement to both surfaces. Quickly insert the repair fittings onto the ends of the pipe, ensuring a tight fit. Hold the fittings in place for a few seconds to allow the cement to bond securely.
Allow Time for Curing:
After completing the repair, allow sufficient time for the PVC cement to cure and create a strong bond. Follow the manufacturer’s instructions for curing time, typically ranging from a few minutes to several hours.
Test the Repair:
Once the cement has cured, test the repaired section of the pipe for leaks or weak spots. Turn on the water supply and check for any signs of dripping or moisture. If the repair holds up under pressure, you have successfully fixed the broken PVC pipe.
Consider Preventative Measures:
To prevent future damage to your PVC pipes, consider implementing preventative measures such as regular inspections, proper insulation in cold climates, and avoiding excessive pressure or stress on the pipes.
Faqs
How do I repair a small crack in a PVC pipe?
Clean the area around the crack, apply PVC primer and cement, then use a repair coupling or wrap the area with PVC repair tape for a quick fix.
What should I do if a PVC pipe is leaking at a joint?
Turn off the water supply, disassemble the joint, clean and dry the surfaces, apply primer and cement, and reassemble the joint tightly.
Can I repair a broken PVC pipe without cutting it out?
Yes, you can use a repair coupling or compression fitting to repair a broken PVC pipe without cutting out the damaged section, saving time and effort.
In conclusion, repairing a broken PVC pipe is a straightforward process that can be accomplished with basic tools and materials. By following these steps and taking preventative measures, you can ensure the longevity and reliability of your plumbing system. If you encounter extensive damage or are unsure about the repair process, consult a professional plumber for assistance.